Difference between revisions of "Setting up Dreamwidth on Linode"
Foxfirefey (Talk | contribs) (→Installing necessary packages) |
Foxfirefey (Talk | contribs) (→Installing necessary packages) |
||
| Line 193: | Line 193: | ||
apt-get install mercurial subversion apache2-mpm-prefork \ | apt-get install mercurial subversion apache2-mpm-prefork \ | ||
libapache2-mod-perl2 libapache2-mod-apreq2 libapache2-request-perl \ | libapache2-mod-perl2 libapache2-mod-apreq2 libapache2-request-perl \ | ||
| − | mysql-server wget | + | mysql-server wget unzip links |
apt-get install libclass-autouse-perl libcompress-zlib-perl \ | apt-get install libclass-autouse-perl libcompress-zlib-perl \ | ||
libdatetime-perl libdigest-sha1-perl libgd-gd2-perl libhtml-template-perl \ | libdatetime-perl libdigest-sha1-perl libgd-gd2-perl libhtml-template-perl \ | ||
| Line 205: | Line 205: | ||
apt-get install libimage-size-perl libunicode-maputf8-perl | apt-get install libimage-size-perl libunicode-maputf8-perl | ||
apt-get install libgtop2-dev build-essential | apt-get install libgtop2-dev build-essential | ||
| − | perl -MCPAN -e 'install GTop' | + | perl -MCPAN -e 'install GTop' # this will guide you through setting up CPAN |
perl -MCPAN -e 'install Unicode::CheckUTF8' | perl -MCPAN -e 'install Unicode::CheckUTF8' | ||
perl -MCPAN -e 'install Captcha::reCAPTCHA' | perl -MCPAN -e 'install Captcha::reCAPTCHA' | ||
Revision as of 08:19, 30 July 2008
These instructions will help you set up Dreamwidth on Linode hosting, brought to you by ![]() exor74.
exor74.
Contents
Ordering
Newark is the best choice for a node location for 2 reasons:
- Guaranteed 64-bit host
- Fast internal-network disk image fetch from
![[info]](http://wiki.dreamwidth.net/wiki/extensions/LJ/images//userinfo.gif) exor674
exor674
Setting up a Linux Deployment
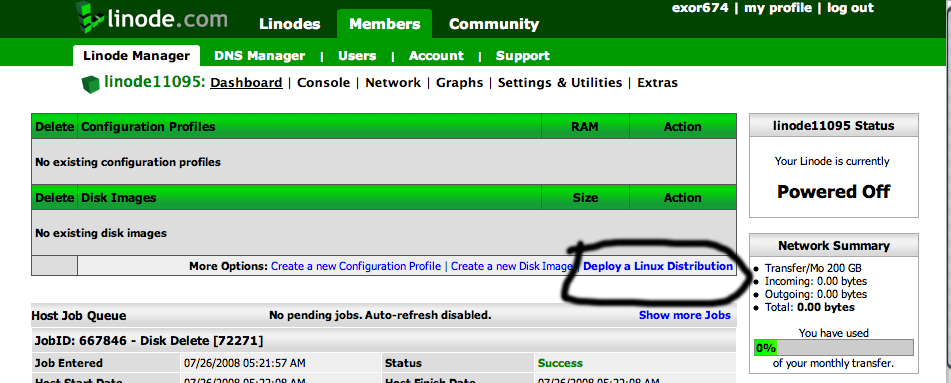
Click on "Deploy a Linux Distribution":
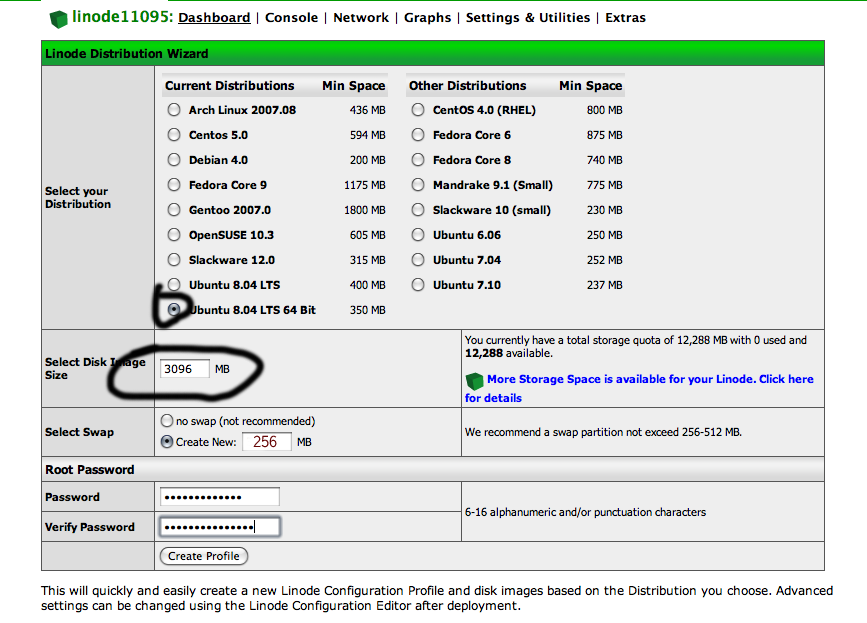
This will bring you to the Linode Distribution Wizard.
- Click on "Ubuntu 8.04 LTS 64 Bit"
- Enter "3096" as the disk image size
- Enter "256" Swap
- Enter password, and hit "Create Profile"
Wait for it to complete, and then hit "Create new disk image".
- Label: "Dreamwidth Image"
- Size: "1024"
- Filesystem Type: "ext3"
- Hit "Create Disk"
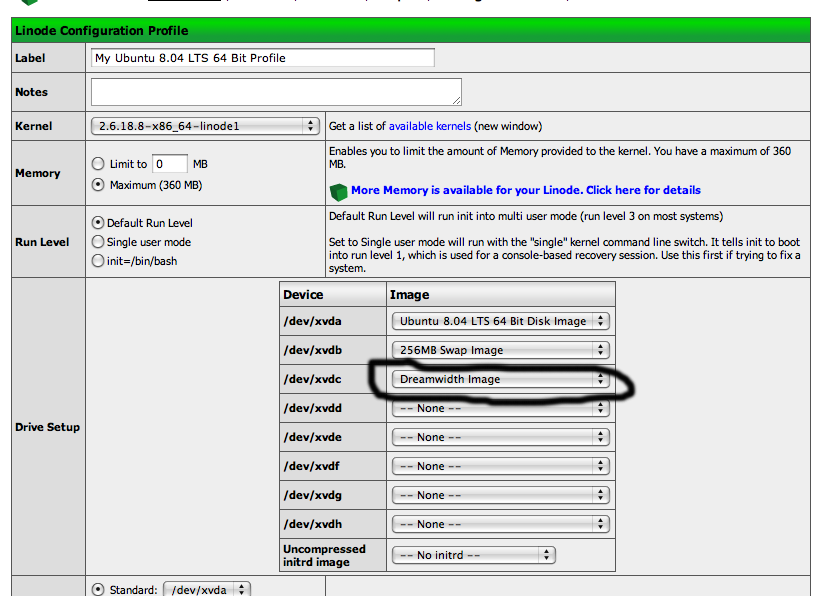
- Click on "Ubuntu 8.04 LTS 64 Bit Profile"
- Set /dev/xvdc to "Dreamwidth Image", and hit "Save Profile"
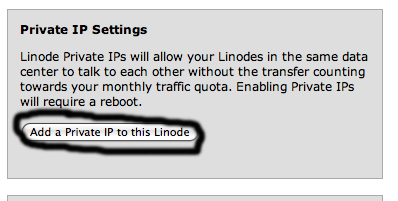
Go to the "Network" tab, and click on "Add Private IP".
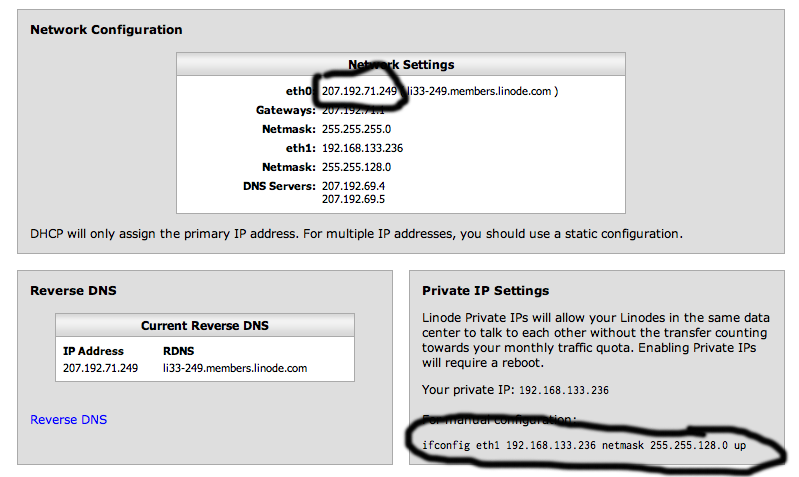
And take note of the text after "eth0"--this is your node's public IP--and the text under "for manual configuration"--your private network IP.
Getting into the node
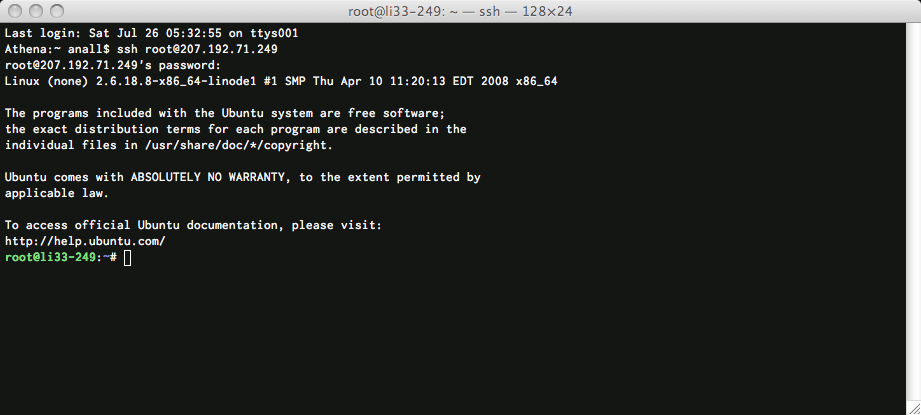
Go back to the "Dashboard" tab, hit "Boot", and wait for the task to complete. Open your SSH client and SSH to root@noted eth0 address, and enter your root password:
Install using the Dreamwidth image
We're going to install a canned Dreamwidth image to make things easier on us.
Install wget:
apt-get install wget
If you are on a Newark node:
noted "for manual configuration" line
wget http://192.168.133.102:6887/Linode-Dreamwidth-Ubuntu.img
If you are *NOT* in Newark:
wget http://ns1.andreanall.com:6887/Linode-Dreamwidth-Ubuntu.img
Now you can copy the image to your deployment:
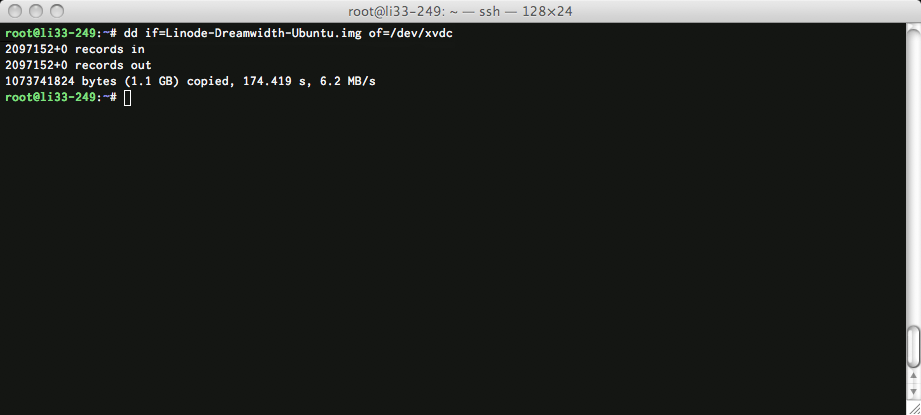
dd if=Linode-Dreamwidth-Ubuntu.img of=/dev/xvdc
Note: This may take a while. Now you can delete the old Ubuntu image and switch over to the Dreamwidth image. To delete the old Ubuntu image:
- Press "Shutdown"(Image 1), and wait for it to finish
- Ticky the box next to "Ubuntu 8.04 LTS 64 Bit Disk Image (ext3)"(Image 2) and hit "Delete"(Image 3)
- Click on "Ubuntu 8.04 LTS 64 Bit Profile"(Image 4)
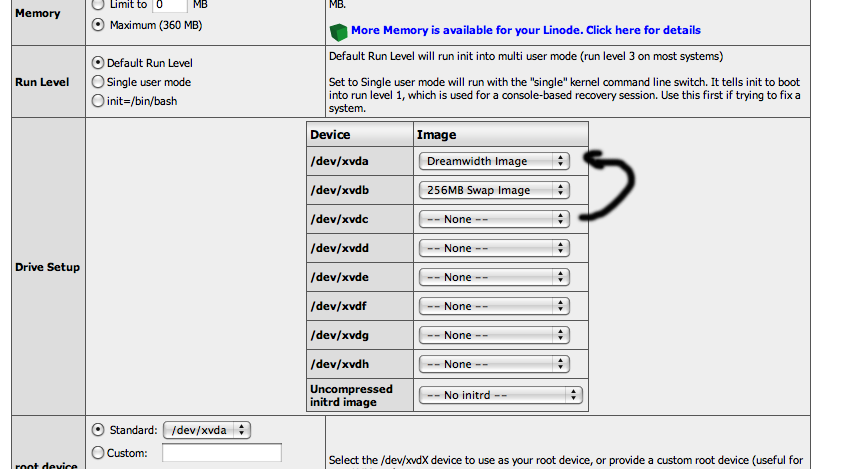
To switch to the Dreamwidth Image, click on your profile's link and:
- Change /dev/xvda to "Dreamwidth Image"
- Clear /dev/xvdc
- Hit "Save Profile"
- Click on "Dreamwidth Image"
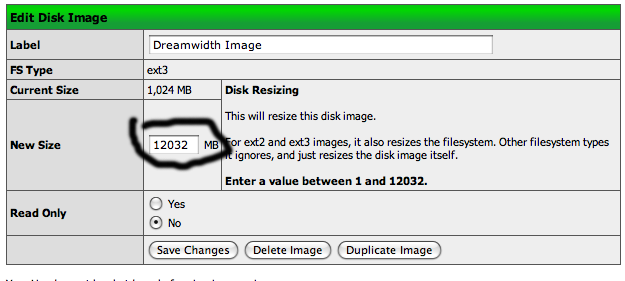
- Enter "12032" in the "New Size" field
- Hit "Save Changes"
- Wait till it completes
Setting up the new disk image
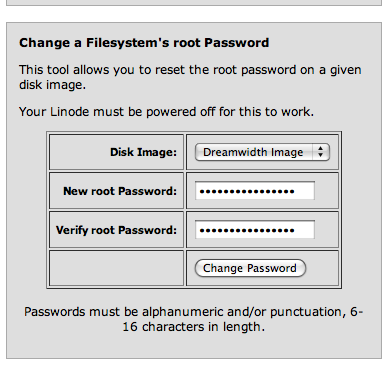
- Go to the "Settings & Utilities" tab
- In the "Change a Filesystem's root Password" section
- Set the "Disk Image" to "Dreamwidth Image"
- Enter your password
- Hit "Change Password"
- Go to the "Dashboard" tab
Now, resign into your node:
- Hit "Boot"
- Wait 30 seconds after the job completes.
- Open your SSH client and SSH to root@noted eth0 address, and enter your root password
Note: you may have to tell SSH that nothing funky is happening
rm /etc/ssh/*key*
dpkg-reconfigure openssh-server
exit
Open your SSH client and SSH to root@noted eth0 address, and enter your root password. Note: you may have to tell SSH that nothing funky is happening.
Set up database and postfix
passwd dw
wget http://ns1.andreanall.com:6887/LDW-patch1.tgz
cd /
tar xzvpf ~/LDW-patch1.tgz
rm ~/LDW-patch1.tgz
mysqladmin -pomg\!dreamwidth password newpassword
echo 'set password = password("othernewpass")' | \
  mysql -udw -pyay\!dreamwidth
dpkg-reconfigure postfix
Choose "Internet Site". Enter
Note: If you can't enter your domain name in the Mac OS X Terminal because it won't delete the default, go to Preferences->Advanced and click "Delete sends Ctrl-H". Change it back afterwards, or vi will delete before instead of after the cursor.
su - dw
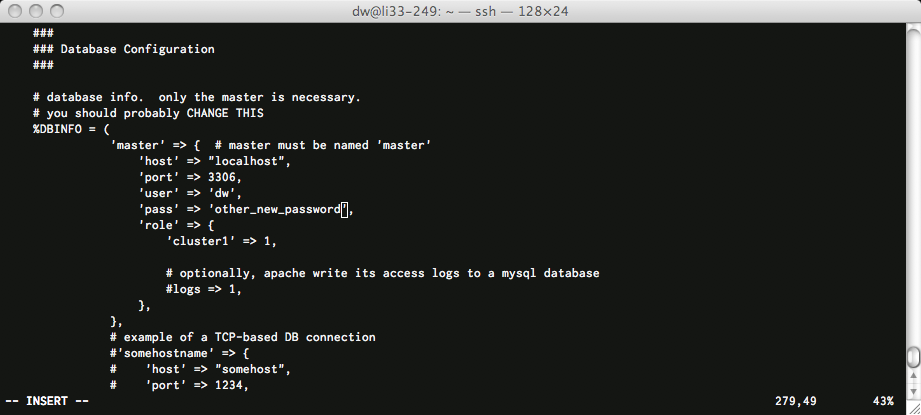
Set up ljconfig.pl
vi etc/ljconfig.pl
- Use the right domain: Change $DOMAIN to your domain
- Get the right database password: Search for "yay" (
/yayin vi). Change "yay!dreamwidth" to "other_new_password"
Save and quit vi (:wq) and restart apache:
sudo /etc/init.d/apache2 restart
- ??
- PROFIT!
Installing from scratch
Setting up the user
apt-get install vim
sudo visudo
uncomment line: %sudo ALL=NOPASSWD: ALL
Add the user:
adduser username
Fill out the user's info and put them in the sudo group:
usermod -a -G sudo username
So, to use dw as a username:
adduser dw
usermod -a -G sudo dw
Bringing the system up to date
You might want to:
apt-get update
apt-get upgrade
If you want man pages on your system:
apt-get install man
Installing necessary packages
apt-get install mercurial subversion apache2-mpm-prefork \
  libapache2-mod-perl2 libapache2-mod-apreq2 libapache2-request-perl \
  mysql-server wget unzip links
apt-get install libclass-autouse-perl libcompress-zlib-perl \
  libdatetime-perl libdigest-sha1-perl libgd-gd2-perl libhtml-template-perl \
  libwww-perl libmime-lite-perl libnet-dns-perl liburi-perl libxml-simple-perl
apt-get install libclass-accessor-perl libclass-data-inheritable-perl \
  libclass-trigger-perl libcrypt-dh-perl libmath-bigint-gmp-perl \
  liburi-fetch-perl libgd-graph-perl libgnupg-interface-perl
apt-get install libmail-gnupg-perl perlmagick libproc-processtable-perl \
  libsoap-lite-perl librpc-xml-perl libstring-crc32-perl libtext-vcard-perl \
  libxml-atom-perl libxml-rss-perl
apt-get install libimage-size-perl libunicode-maputf8-perl
apt-get install libgtop2-dev build-essential
perl -MCPAN -e 'install GTop' # this will guide you through setting up CPAN
perl -MCPAN -e 'install Unicode::CheckUTF8'
perl -MCPAN -e 'install Captcha::reCAPTCHA'

add-user dw

su - dw
Add "export LJHOME=/home/dw" to the end of ~/.profile, then:
source ~/.profile
Downloading the Dreamwidth code
sudo apt-get install wget
wget http://hg.dwscoalition.org/dw-free/raw-file/e4be2e864b95/bin/bootstrap.pl
perl bootstrap.pl
-- continue from dw-nonfree
